

This translation is community contributed and may not be up to date. We only maintain the English version of the documentation. Read this manual in English
GUI betikleri
Grafik kullanıcı arayüzünüzün (GUI) mantığını denetlemek ve düğümleri (node) canlandırmak için Lua betikleri (script) kullanırsınız. GUI betikleri, normal oyun nesnesi (game object) betikleriyle aynı şekilde çalışır; ancak farklı bir dosya türünde kaydedilir ve farklı bir işlev kümesine, yani gui modülünün işlevlerine erişir.
GUI için betik ekleme
Bir GUI’ye betik eklemek için önce Assets tarayıcısında bir konuma sağ tıklayın ve açılan bağlam menüsünden New ▸ Gui Script seçeneğini seçerek bir GUI betik dosyası oluşturun.
Düzenleyici, yeni betik dosyasını otomatik olarak açar. Bu dosya bir şablona dayanır ve oyun nesnesi betikleri gibi boş yaşam döngüsü (lifecycle) işlevleri içerir:
function init(self)
   -- Add initialization code here
   -- Remove this function if not needed
end

function final(self)
   -- Add finalization code here
   -- Remove this function if not needed
end

function update(self, dt)
   -- Add update code here
   -- Remove this function if not needed
end

function on_message(self, message_id, message, sender)
   -- Add message-handling code here
   -- Remove this function if not needed
end

function on_input(self, action_id, action)
   -- Add input-handling code here
   -- Remove this function if not needed
end

function on_reload(self)
   -- Add input-handling code here
   -- Remove this function if not needed
end
Betiği bir GUI bileşenine (component) bağlamak için GUI bileşeninin prototip dosyasını (diğer motorlarda “prefabs” veya “blueprints” olarak da bilinir) açın ve GUI Properties panelini görüntülemek için Outline görünümünde kökü seçin. Script özelliğini betik dosyasına ayarlayın
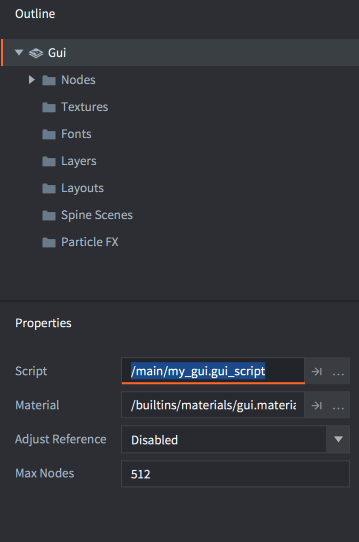
GUI bileşeni oyununuzda bir oyun nesnesine eklenmişse betik artık çalışacaktır.
“gui” ad alanı
GUI betikleri, gui ad alanına (namespace) ve tüm gui işlevlerine erişebilir. go ad alanı kullanılamadığından oyun nesnesi mantığını betik bileşenlerine ayırmanız ve GUI betikleri ile oyun nesnesi betikleri arasında iletişim kurmanız gerekir. go işlevlerini kullanmaya yönelik her girişim hataya neden olur:
function init(self)
   local id = go.get_id()
end
ERROR:SCRIPT: /main/my_gui.gui_script:2: You can only access go.* functions and values from a script instance (.script file)
stack traceback:
   [C]: in function 'get_id'
   /main/my_gui.gui_script:2: in function </main/my_gui.gui_script:1>
İleti aktarımı
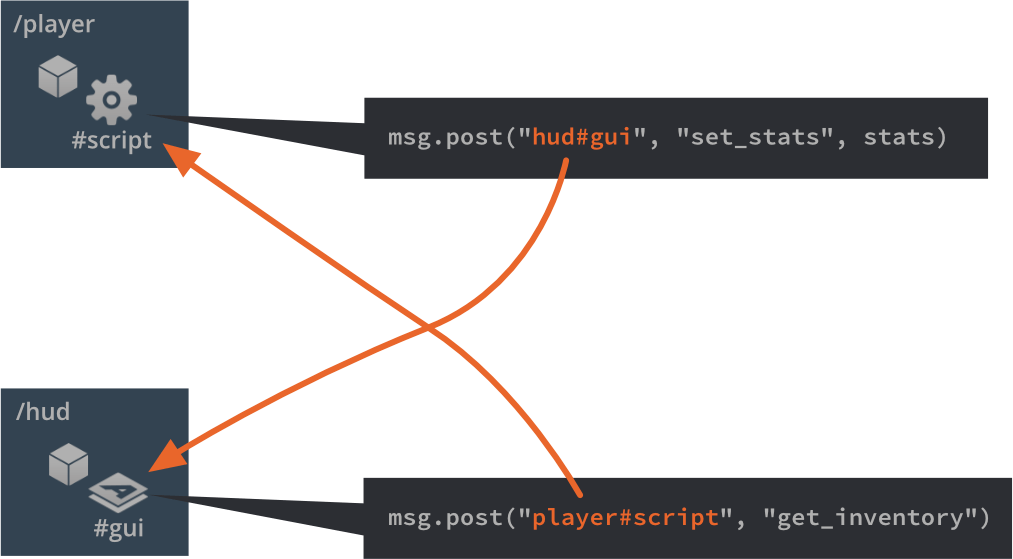
Bir betik bağlanmış her GUI bileşeni, ileti aktarımı (message passing) yoluyla oyununuzun çalışma zamanı ortamındaki diğer nesnelerle iletişim kurabilir; diğer betik bileşenleri gibi davranır.
GUI bileşenini diğer betik bileşenleri gibi adreslersiniz:
local stats = { score = 4711, stars = 3, health = 6 }
msg.post("hud#gui", "set_stats", stats)
Düğümleri adresleme
GUI düğümleri, bileşene bağlanmış bir GUI betiğiyle değiştirilebilir. Her düğümün, düzenleyicide ayarlanan benzersiz bir Id değeri olması gerekir:
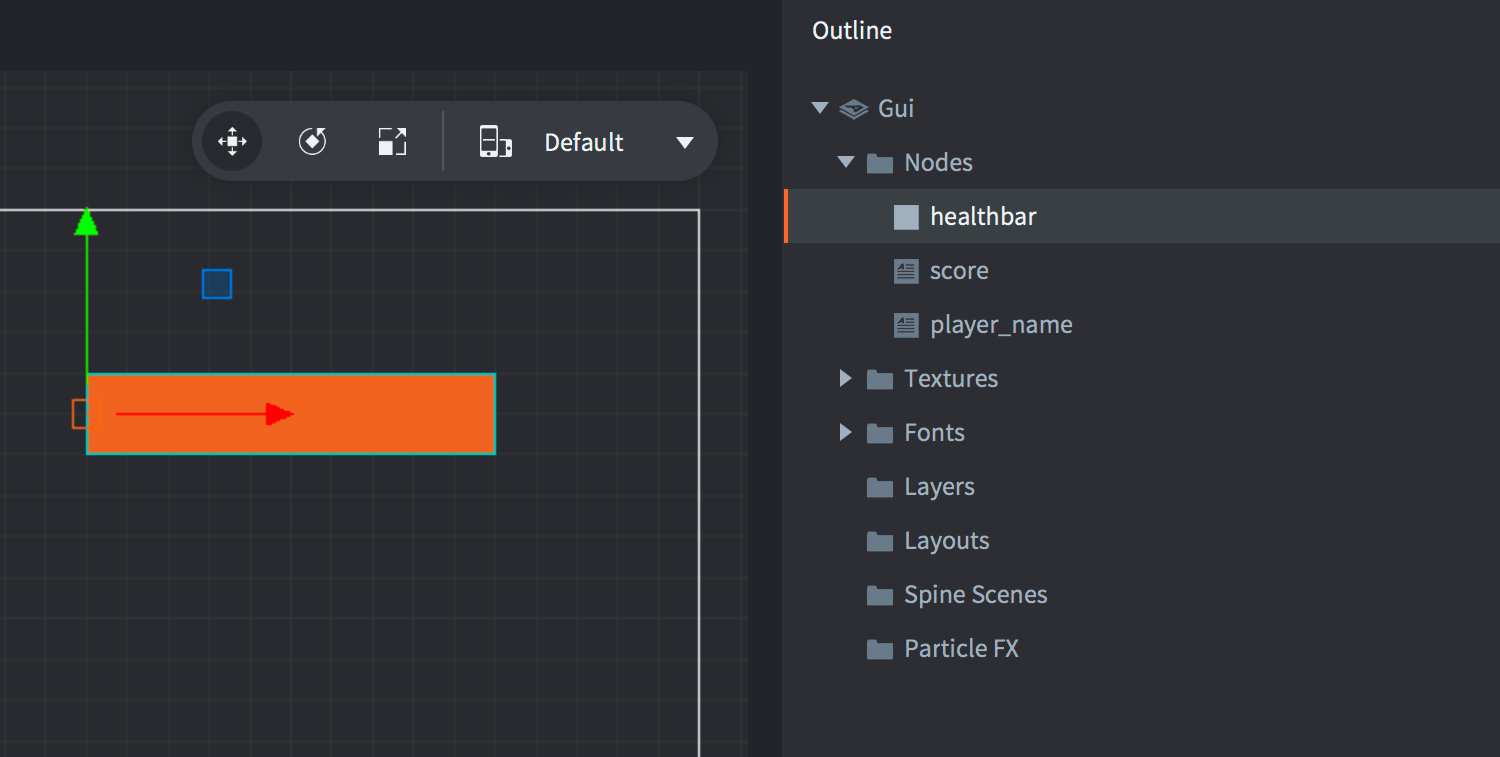
Id değeri, bir betiğin düğüme başvuru edinmesini ve düğümü gui ad alanı işlevleriyle değiştirmesini sağlar:
-- extend the health bar by 10 units
local healthbar_node = gui.get_node("healthbar")
local size = gui.get_size(healthbar_node)
size.x = size.x + 10
gui.set_size(healthbar_node, size)
Dinamik olarak oluşturulan düğümler
Çalışma sırasında betikle yeni bir düğüm oluşturmak için iki seçeneğiniz vardır. İlk seçenek, gui.new_[type]_node() işlevlerini çağırarak sıfırdan düğümler oluşturmaktır. Bu işlevler yeni düğüme ait bir başvuru döndürür; bu başvuruyu düğümü değiştirmek için kullanabilirsiniz:
-- Create a new box node
local new_position = vmath.vector3(400, 300, 0)
local new_size = vmath.vector3(450, 400, 0)
local new_boxnode = gui.new_box_node(new_position, new_size)
gui.set_color(new_boxnode, vmath.vector4(0.2, 0.26, 0.32, 1))

-- Create a new text node
local new_textnode = gui.new_text_node(new_position, "Hello!")
gui.set_font(new_textnode, "sourcesans")
gui.set_color(new_textnode, vmath.vector4(0.69, 0.6, 0.8, 1.0))
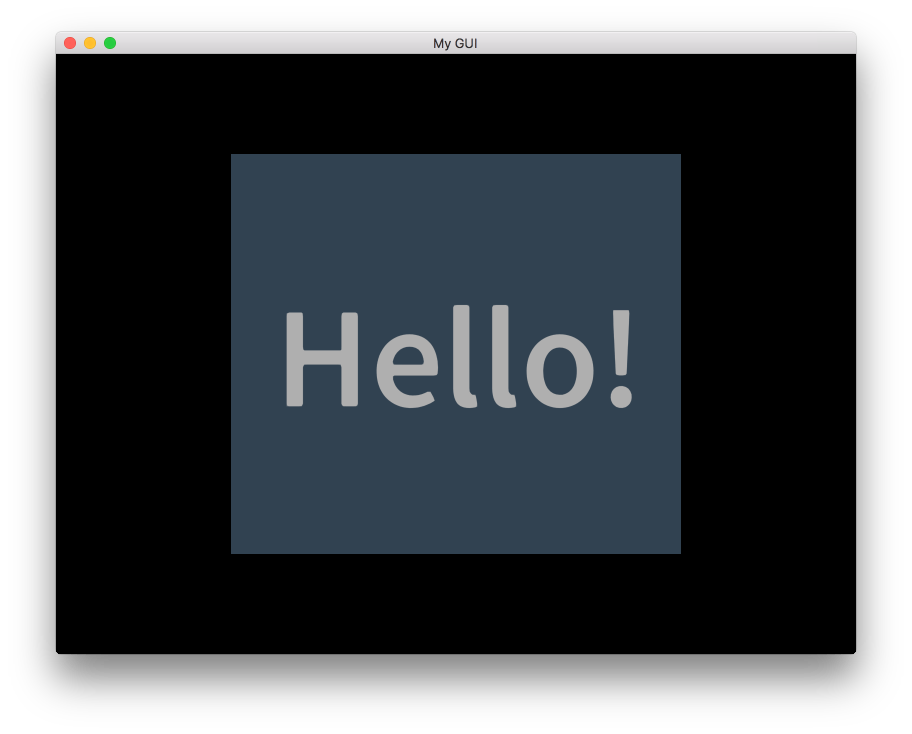
Yeni düğümler oluşturmanın diğer yolu, gui.clone() işleviyle mevcut bir düğümü veya gui.clone_tree() işleviyle bir düğüm ağacını klonlamaktır:
-- clone the healthbar
local healthbar_node = gui.get_node("healthbar")
local healthbar_node_2 = gui.clone(healthbar_node)

-- clone button node-tree
local button = gui.get_node("my_button")
local new_button_nodes = gui.clone_tree(button)

-- get the new tree root
local new_root = new_button_nodes["my_button"]

-- move the root (and children) 300 to the right
local root_position = gui.get_position(new_root)
root_position.x = root_position.x + 300
gui.set_position(new_root, root_position)
Dinamik düğüm tanımlayıcıları
Dinamik olarak oluşturulan düğümlere bir tanımlayıcı atanmaz. Bu, bilinçli bir tasarım tercihidir. Düğümlere erişmek için yalnızca gui.new_[type]_node(), gui.clone() ve gui.clone_tree() işlevlerinden döndürülen başvurular gerekir ve bu başvuruları saklamanız önerilir.
-- Add a text node
local new_textnode = gui.new_text_node(vmath.vector3(100, 100, 0), "Hello!")
-- "new_textnode" contains the reference to the node.
-- The node has no id, and that is fine. There's no reason why we want
-- to do gui.get_node() when we already have the reference.