Editor overview
The editor allows you to browse and manipulate all files and folders in your game project in an efficient manner. Editing files brings up a suitable editor and shows all relevant information about the file in separate views.
Starting the Editor
When you run the Defold Editor, you are presented with a project selection and creation screen. Click to select what you want to do:
- MY PROJECTS
- Here are your recently opened projects so you can quickly access them. This is the default view of the starting screen.
If you didn’t open any projects earlier (or removed all), it will show two buttons - you can click
Open From Disk…to find and open one using system file browser or clickCreate New Projectbutton and it will switch to a tabTEMPLATES.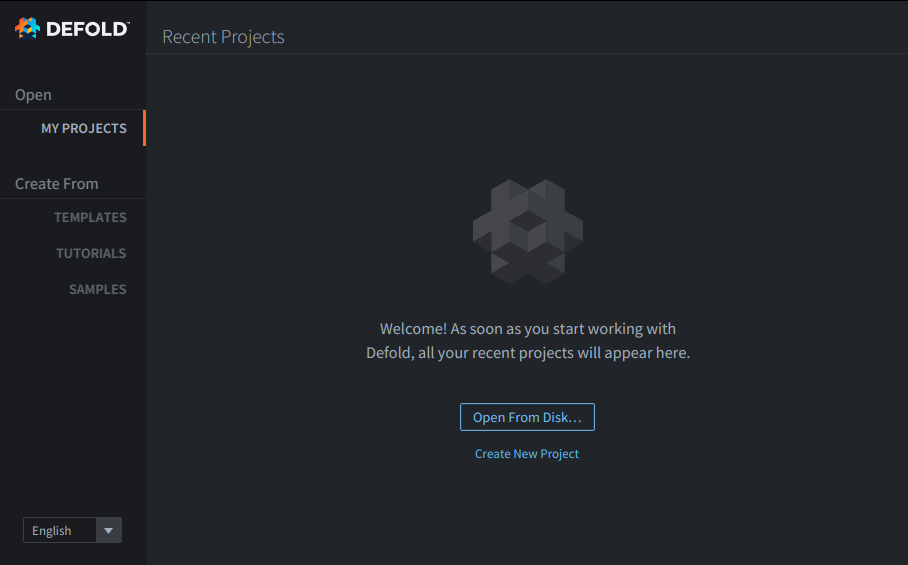
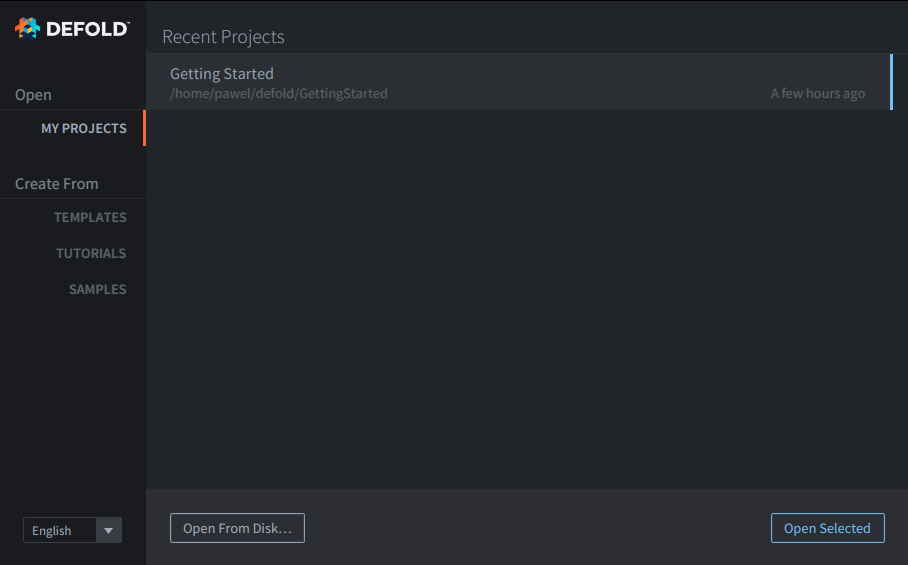
If you have earlier opened projects, it will show a list of your projects, like on the picture below:
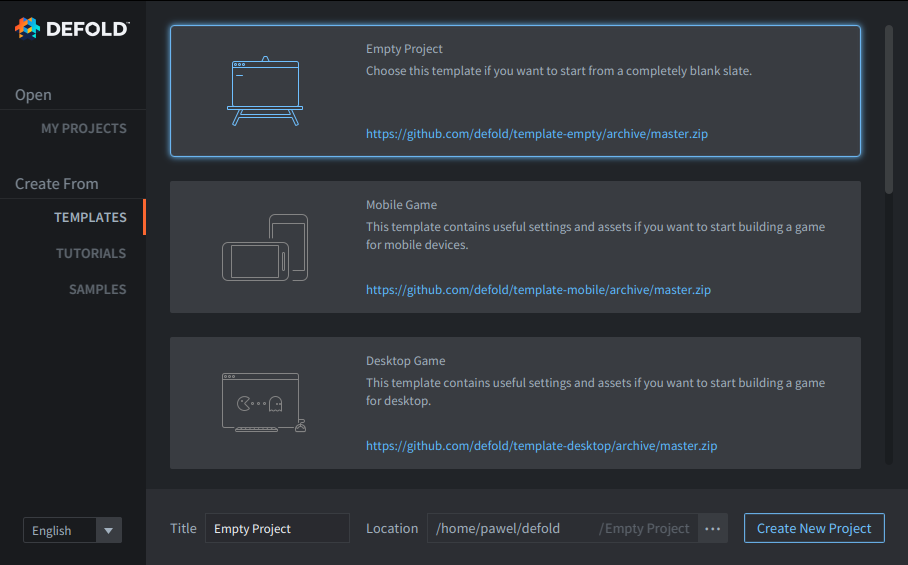
- TEMPLATES
- Contains empty or almost empty basic projects made for quick start of a new Defold project for certain platforms or using certain extensions.
- TUTORIALS
- Contains projects with guided tutorials to learn, play and modify, if you would like to follow a tutorial.
- SAMPLES
- Contains projects prepared to showcase certain use cases.
When you create a new project it is stored on your local drive and any edits you do are saved locally.
You can learn more about the different options in the Project Setup manual.
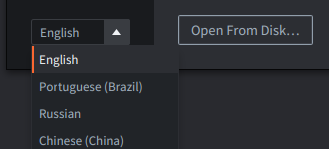
Editor Language
In the bottom left corner of the starting screen you can see a Language selection - select from the currently available localizations. This is also available in the Editor in File ▸ Preferences ▸ General ▸ Editor Language.
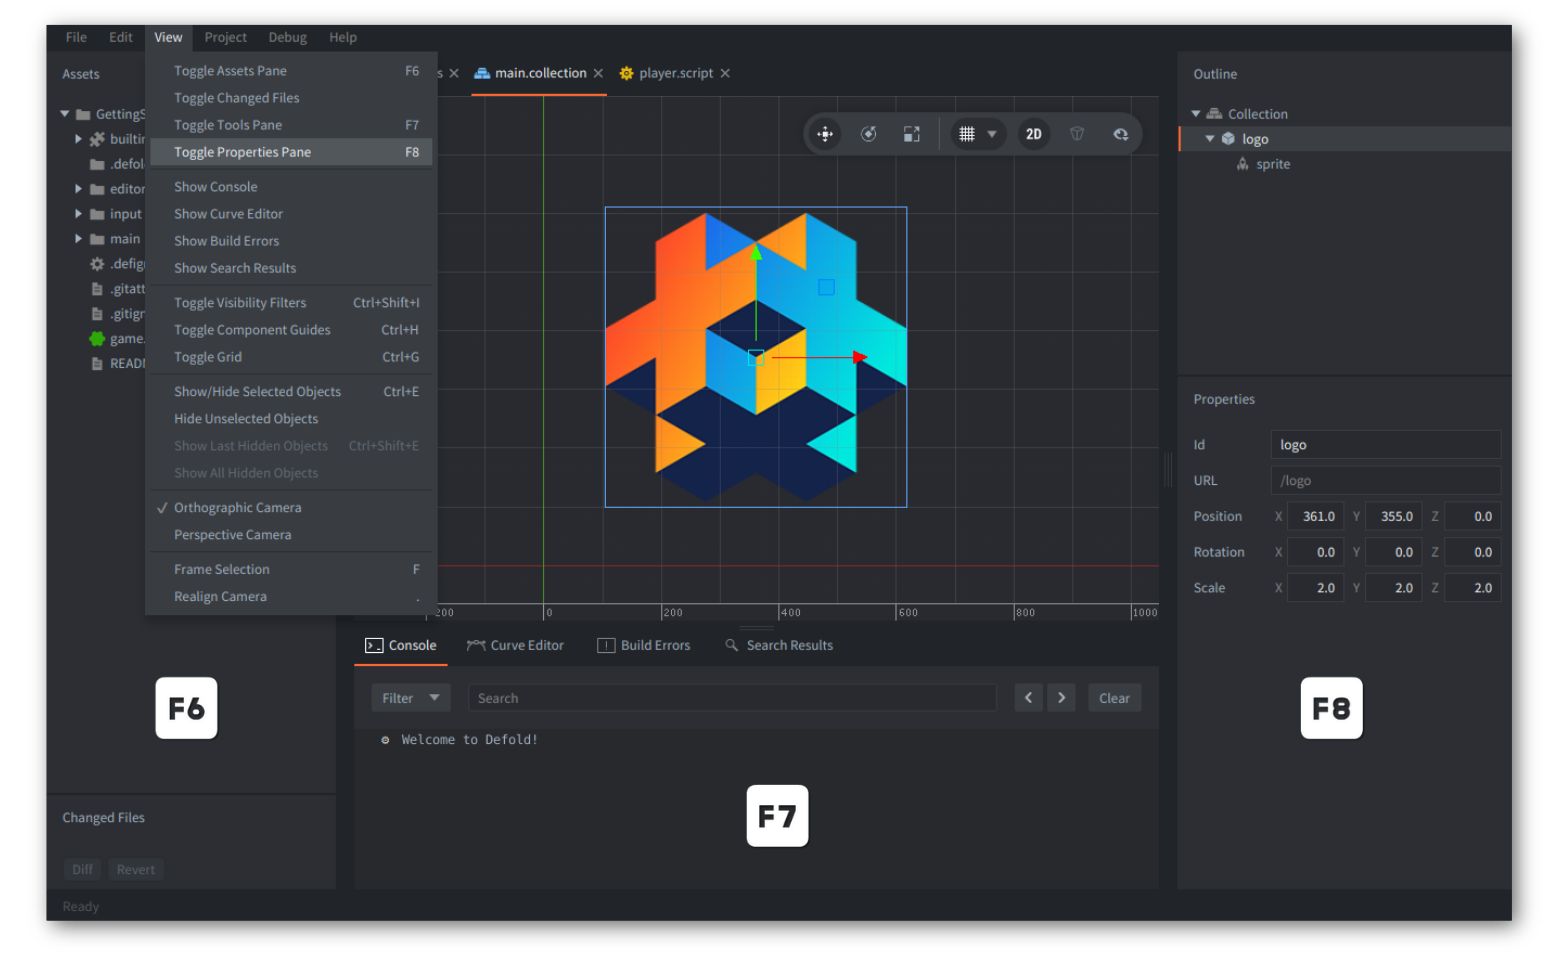
The Editor panes
The Defold Editor is separated into a set of panes, or views, that display specific information.
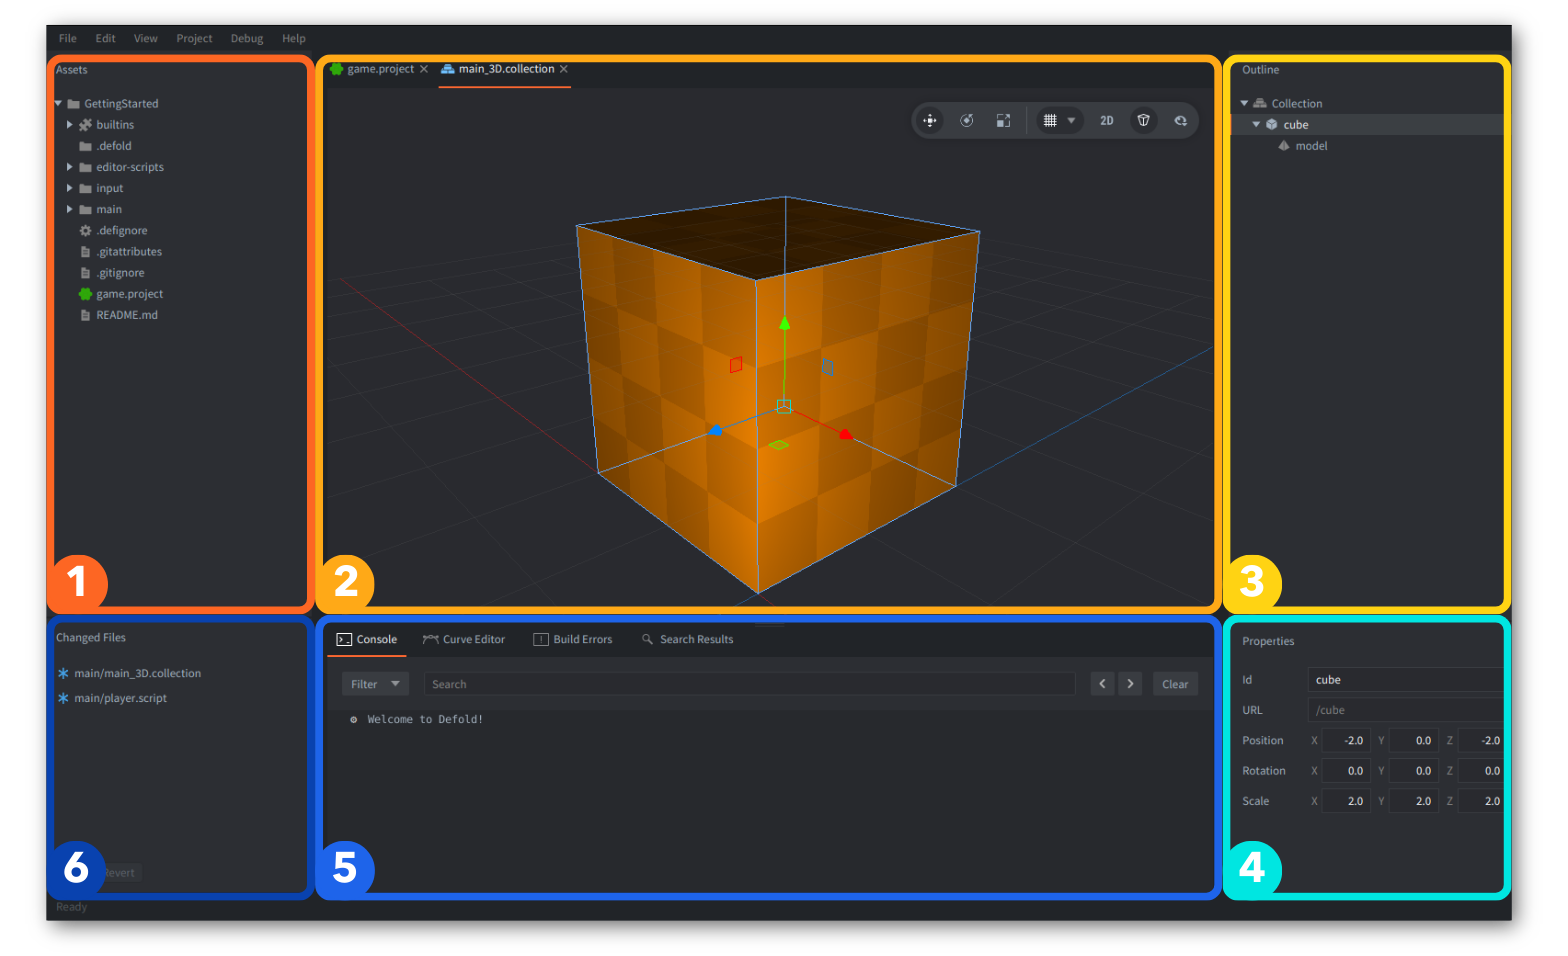
1. Assets pane
Lists all the files and folders that are part of your project in a tree structure, corresponding to the same structure on your disk. Click and scroll to navigate the list. All file oriented operations can be made in this view:
- Left Mouse Click to select any file or folder, and while holding ⇧ Shift you can expand selection or while holding Ctrl/⌘ Cmd you can (un)select clicked.
- Double Mouse Click a file to open it in a specific editor for that file type.
- Drag and Drop to add files from elsewhere on your disk to the project or move files and folders to new locations in the project.
- Right Mouse Click to open a Context Menu from where you can create new files or folders, rename, delete, track file dependencies and more.
Files and folders deleted through the Assets pane are moved to the system Trash or Recycle Bin when the platform supports it. If moving an item to the trash is unsupported or fails, the editor permanently deletes it.
2. Scene Editor pane
Double-clicking a collection, game object, or visual component file opens the Scene Editor — the visual editor for building and editing scenes. Script files and other non-visual resources open in their own dedicated editors instead.
Some of the core features offered by the Scene Editor:
- 2D and 3D scene navigation with orthographic and perspective camera modes
- Transform tools for moving, rotating and scaling objects
- Free Camera Mode for first-person 3D navigation
- Grid settings with configurable size, plane and appearance
- Visibility filters to toggle component types and guides
Read more in the Scene Editor manual.
3. Outline pane
This view shows the content of the file currently being edited, but in a hierarchical tree structure. The Outline reflects the editor view and allows you to perform operations on your items:
- Left Mouse Click to select an item, and while holding ⇧ Shift you can expand selection or while holding Ctrl/⌘ Cmd you can (un)select clicked.
- Drag and drop to move items. Drop a game object on another game object in a collection to create a parent-child relationship.
- Right Mouse Click to open a Context Menu from where you can add items, delete selected items etc.
It is possible to toggle the visibility of game objects and visual components by clicking on the little 👁 Eye Icon to the right of an element in the list.
4. Properties pane
This view shows properties associated with the currently selected item, like Id, URL, Position, Rotation, Scale, and/or other component specific properties and also custom properties for scripts.
You can also Drag the ↕ Up-Down Arrow and move mouse to change value of the given numerical property.
5. Tools pane
This view has several tabs.
Console tab : shows any error, warning and info engine output or purposeful printing that you do while your game is running,
Build Errors : shows errors from the building process,
Search Results : shows results of searching (Ctrl/⌘ Cmd + Shift + F) the whole project, if you click Keep Results
Curve Editor : used when editing curves in the Particle Editor.
The Tools pane is also used for interacting with the integrated debugger. Read more about it in the Debugging Manual.
6. Changed Files pane
If your project uses Git, this view lists files that have been changed, added, renamed, or deleted locally compared with the current commit (HEAD). Use an external Git client or the command line to synchronize with a remote repository. You can learn more in the Version Control manual. Some file-oriented operations can be performed in this view:
- Left Mouse Click - to select a given file, and while holding ⇧ Shift you can expand selection or while holding Ctrl/⌘ Cmd you can (un)select clicked. If a single changed file is selected you can click
Diffto show the differences. You can clickRevertto undo changes in all selected files. - Double Left Mouse Click a file to open a view of the file. The editor opens the file in a suitable editor, just like in the assets view.
- Right Mouse Click a file to open a pop up menu from where you can open a diff view, revert all changes done to the file, find the file on the filesystem and more.
Menu Bar
On the top of the Editor view or in System Bar on Mac you can find Menu Bar with 6 menus: File, Edit, View, Project, Debug, Help. Their functions will be explained in the manuals.
Status Bar
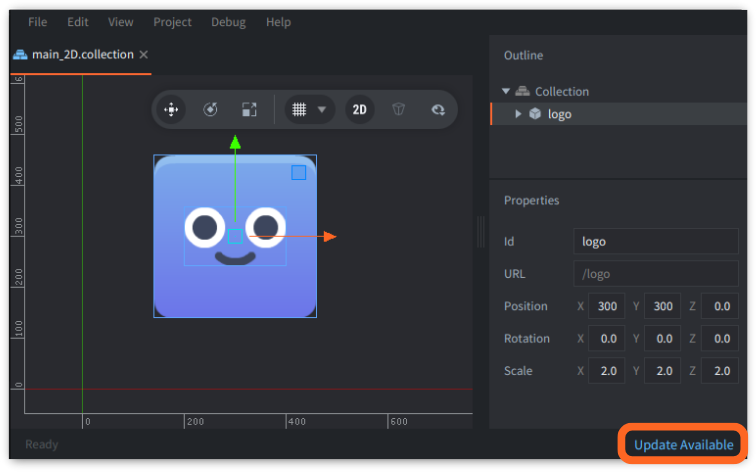
On the bottom bar of the Editor you can find a narrow space in which the Status is displayed, e.g.:
- when a new update is available a clickable button
Update Availablewill be visible - check section Updating the Editor in this manual below. - when building or bundling a progress of it will be presented there.
Panes Size and Visibility
Panes size can be adjusted inside the Editor by Dragging the section borders between all described above 6 Panes.
Panes visibility can be toggled in the Editor by using options in View menu or using given shortcuts:
Toggle Assets Pane(F6) to toggle Assets and Changed Files Panes visibilityToggle Changed Filesto toggle visibility of the Changed Files Pane aloneToggle Tools Pane(F7) to toggle Tools Pane visibilityToggle Properties Pane(F8) to toggle Outline and Properties Panes visibility
In the View menu you can also toggle or change other visibility related settings, like Grid, Guides, Camera or fit the view to selection (Frame Selection or F key) and toggle between default 2D and 3D view (Realign Camera or . key), many of them accessible from the Toolbar or via shortcuts too.
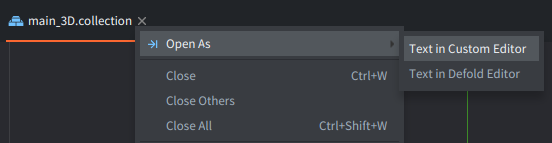
Tabs
If you have multiple files open, a separate tab for each file is shown at the top of the Editor view. Tabs in a single pane can be moved around - Drag and Drop them to swap their positions inside the tabs bar. You can also:
- Right Mouse Click on a tab to open a Context Menu,
- Click
Close(Ctrl/⌘ Cmd + W) a single tab, - Click
Close Othersto close all tabs except the selected one, - Click
Close All(Ctrl/⌘ Cmd + Shift+W) to close all tabs in the active pane, - Select
➝| Open As- to use other than default editor or associated external tool set inFile ▸ Preferences ▸ Code ▸ Custom Editor. Check more in Preferences manual.
Side-by-side editing
It is possible to open 2 editor views side by side.
- Right Mouse Click the tab for the editor you want to move and select
Move to Other Tab Pane.
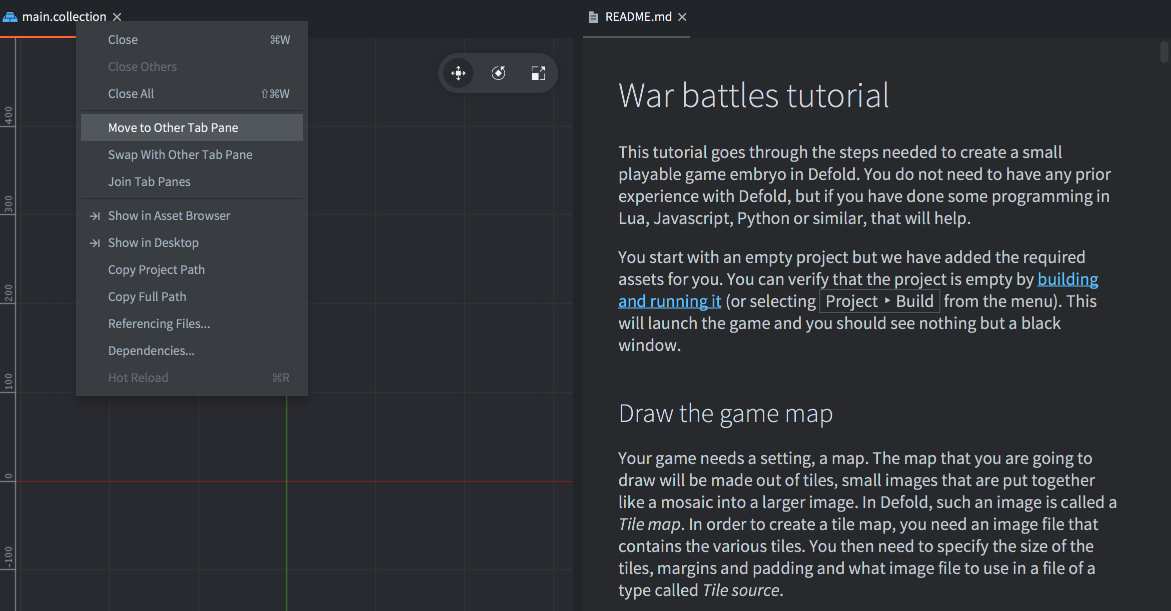
You can also use the tab menu to Swap with Other Tab Pane to move given tab between panes or Join Tab Panes to a single pane.
Creating new project files
To create new resource files, either select File ▸ New… and then choose the file type from the menu, or use the context menu:
Right Mouse Click the target location in the Assets browser, then select New… ▸ [file type]:
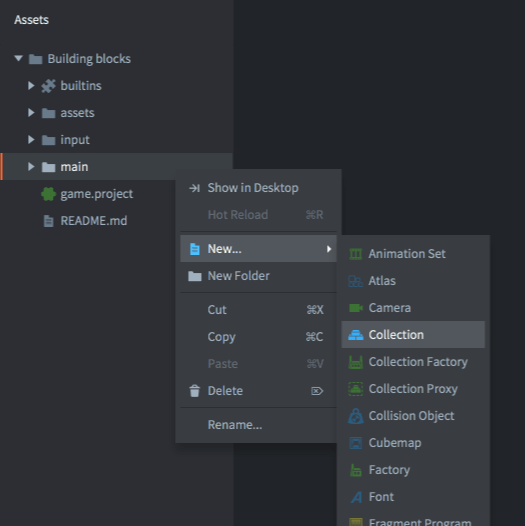
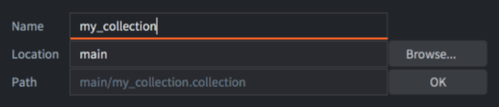
Type a suitable Name for the new file and eventually change Location. The full file name including the file type suffix is shown under Preview in the dialog:
Templates
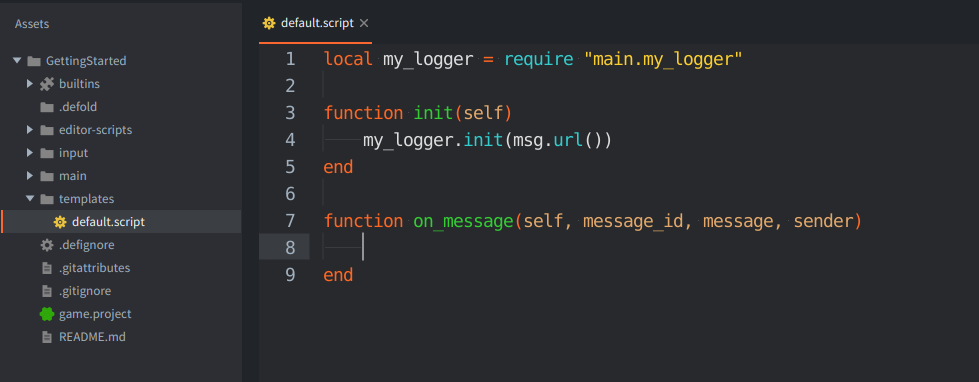
It is possible to specify custom templates for each project. To do so, create a new folder named templates in the project’s root directory, and add new files named default.* with the desired extensions, such as /templates/default.gui or /templates/default.script. Additionally, if the {{NAME}} token is used in these files, it will be replaced with the filename specified in the file creation window.
If a template is available for a given file type, whenever a new file of this type is created, it will be initialized with the content of the file from templates.
Importing files to your project
To add asset files (images, sounds, models etc) to your project, simply drag and drop them to the correct position in the Assets browser. This will make copies of the files at the selected location in the project file structure. Read more about how to import assets in our manual.

Updating the Editor
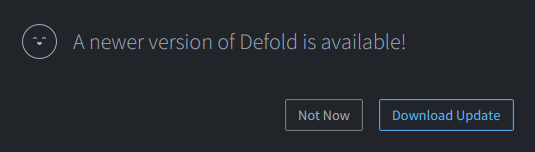
The Editor will automatically check for updates when connected to internet. When an update is detected a blue clickable link Update Available will be shown in the lower left corner of the project selection screen or in the lower right corner of the Editor window.

Press the Update Available clickable link to download and update. A confirmation window with information will pop up - click Download Update to proceed.
You will see the download progress in the bottom status bar:

After update is downloaded the blue link will change to Restart to Update. Click it to restart and open the updated Editor.

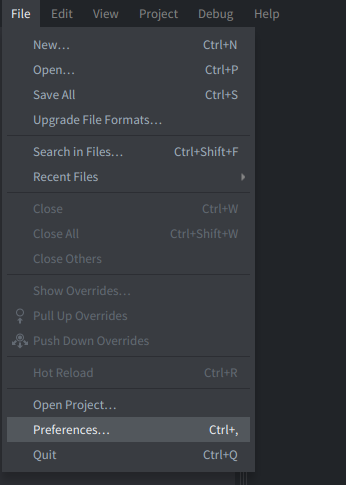
Preferences
You can modify the settings of the Editor in the Preferences window. To open it click File ▸ Preferences… or shortcut Ctrl/⌘ Cmd + ,
Read more details in the Preferences manual
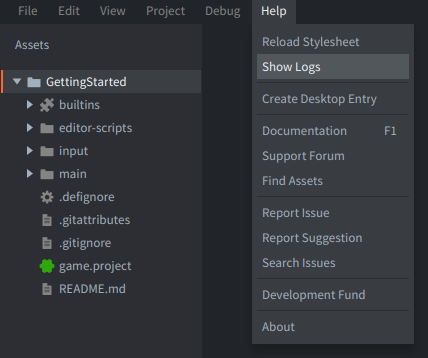
Editor Logs
If you run into a problem with the Editor and need to report issue (Help ▸ Report Issue) it is a good idea to provide log files from the editor itself. To open location of the logs in your system browser click on Help ▸ Show Logs.
Read more in Getting Help manual.
The editor logs files can be found here:
- Windows:
C:\Users\ **Your Username** \AppData\Local\Defold - macOS:
/Users/ **Your Username** /Library/Application Support/or~/Library/Application Support/Defold - Linux:
$XDG_STATE_HOME/Defoldor~/.local/state/Defold
You can also get access to editor logs while the Editor is running if it is started from a terminal/command prompt. To launch the Editor use command:
# Linux:
$ ./path/to/Defold/Defold

# macOS:
$ > ./path/to/Defold.app/Contents/MacOS/Defold
Editor Server
When the Editor opens a project, it will start a web server on a random port. The server may be used to interact with the editor from other applications. The port is written to the .internal/editor.port file.
The server provides an OpenAPI specification at http://localhost:$(cat .internal/editor.port)/openapi.json. This is a useful minimal starting point for agentic workflows.
Additionally, the editor executable has a command line option --port (or -p), which allows specifying the port during launch, e.g.::
# Windows
.\path\to\Defold\Defold.exe --port 8181

# Linux:
./path/to/Defold/Defold --port 8181

# macOS:
./path/to/Defold/Defold.app/Contents/MacOS/Defold --port 8181
Editor Installation Metadata
When the Editor starts, it writes information about the launcher and installation paths to a well-known location. This can be used by third-party IDE integrations and other tools to find installed Defold editors:
| OS | Location |
|---|---|
| macOS | ~/Library/Application Support/Defold/installations.json |
| Linux | ${XDG_STATE_HOME:-~/.local/state}/Defold/installations.json |
| Windows | %LOCALAPPDATA%\Defold\installations.json |
The file contains a JSON array with one object per known installation:
[
  {
    "launcherPath": "/Applications/Defold.app/Contents/MacOS/Defold",
    "installPath": "/Applications/Defold.app",
    "lastLaunchedAt": "2026-07-06T12:34:56.789Z"
  }
]
Editor Styling
Editor appearance can be changed with custom styling. Read more in the Editor Styling manual.
FAQ
Q: What are the system requirements for the editor?
A: The editor will use up to 75% of the available memory of the system. On a computer with 4 GB of RAM this should be enough for smaller Defold projects. For mid-sized or large projects it is recommended to use 6 GB or more of RAM.
Q: Are Defold beta versions auto-updating?
A: Yes. The Defold beta editor checks for an update at startup, just like the Defold stable version does.
Q: Why am I getting an error saying java.awt.AWTError: Assistive Technology not found when launching the editor?
A: This error is related to problems with Java assistive technology such as the NVDA screen reader. You probably have an .accessibility.properties file in your home folder. Remove the file and try launching the editor again. (Note: If you do use any assistive technology and require that file to be present then please reach out to us at info@defold.se to discuss alternative solutions).
Discussed here on the Defold forum.
Q: Why am I getting an error saying sun.security.validator.ValidatorException: PKIX path building failed when launching the editor?
A: This exception occurs when the editor tries to make an https connection but the certificate chain provided by the server cannot be verified.
See this link for details on this error.
Q: Why am I am getting a java.lang.OutOfMemoryError: Java heap space when performing certain operations?
A: The Defold editor is built using Java and in some cases the default memory configuration of Java might not be sufficient. If this happens you can manually configure the editor to allocate more memory by editing the editor configuration file. The configuration file, named config, is located in the Defold.app/Contents/Resources/ folder on macOS. On Windows it is located next to Defold.exe executable and on Linux next to the Defold executable. Open the config file and add -Xmx6gb to the line starting with vmargs. Adding -Xmx6gb will set the max heap size to 6 gigabytes (the default is usually 4Gb). It should look something like this:
vmargs = -Xmx6gb,-Dfile.encoding=UTF-8,-Djna.nosys=true,-Ddefold.launcherpath=${bootstrap.launcherpath},-Ddefold.resourcespath=${bootstrap.resourcespath},-Ddefold.version=${build.version},-Ddefold.editor.sha1=${build.editor_sha1},-Ddefold.engine.sha1=${build.engine_sha1},-Ddefold.buildtime=${build.time},-Ddefold.channel=${build.channel},-Ddefold.archive.domain=${build.archive_domain},-Djava.net.preferIPv4Stack=true,-Dsun.net.client.defaultConnectTimeout=30000,-Dsun.net.client.defaultReadTimeout=30000,-Djogl.texture.notexrect=true,-Dglass.accessible.force=false,--illegal-access=warn,--add-opens=java.base/java.lang=ALL-UNNAMED,--add-opens=java.desktop/sun.awt=ALL-UNNAMED,--add-opens=java.desktop/sun.java2d.opengl=ALL-UNNAMED,--add-opens=java.xml/com.sun.org.apache.xerces.internal.jaxp=ALL-UNNAMED